When we developed our new photo noise reduction algorithm in the upcoming ON1 NoNoise AI photo editing software, we took a holistic approach to understand noise and its causes. Thinking like a doctor, if we could prevent noise, that would be better than just treating it. A lot of the research bears this out. The earlier you can tackle noise, the better. A lot of the image noise we see in digital photographs is a side effect of the demosaicing process. If you are unfamiliar with that term, don’t worry, I’ll explain.
Digital camera sensors don’t see in color; they measure the intensity of light. In order to see color, there are tiny little colored filters over each pixel on a sensor. So in a way, each pixel can only measure the intensity of a given color. In most cameras, the colored filters are arranged in a pattern that samples one blue, one red, and two green pixels per block of four pixels. If you were to look at the photo taken at this stage, it would look like a microscopic mosaic made up of just these three colors. To us, it wouldn’t look anything like a normal photo. Yet, that’s essentially what a raw image looks like before it is processed.

The first step in converting raw data into a standard photo is the demosaicing process. This step is done by raw processor application if you shoot in raw, or by your camera if you shoot jpg. This step is where the magic happens. It breaks out the colors into four layers, one red, one blue, and two greens. Then it must compare what little information it has and guesses what the missing values are for each layer. That’s right, for each photo, two-thirds of the values are educated guesses made by your raw processor app. Most of the time, raw processors do an excellent job, and you get a photo that you would expect. However, sometimes things can go wrong.
The first and most obvious spot it can go wrong is noise. As your camera’s sensor struggles in low light, it must work really hard to measure the light intensity available. To do that, it must amplify the signal leading to noise being created in the raw photo. Then imagine how this noise confuses the demosaicing algorithm, which propagates even more noise.
This spot is also the first opportunity a raw processor has to reduce the noise. Training our AI neural network to detect and reduce noise before the photo goes through the demosaicing process ensures noise will not propagate further up in the image processing pipeline. It can better tell what noise is versus small details. This helps maintain sharper details and reduce false color. Other areas where demosaicing can struggle include fine lines, angled blocks, heavy patterns, and strong contrast edges. These can create artifacts such as jagged lines, zippering, false colors on edges, or maize and moire patterns. While these are generally rare, they can take a lot of work to reduce when they do appear.
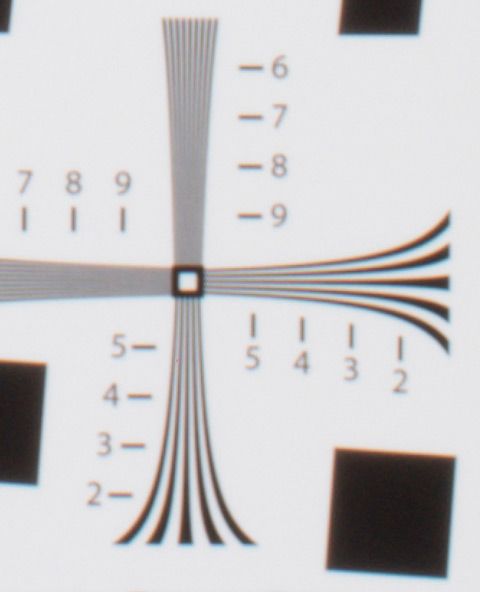
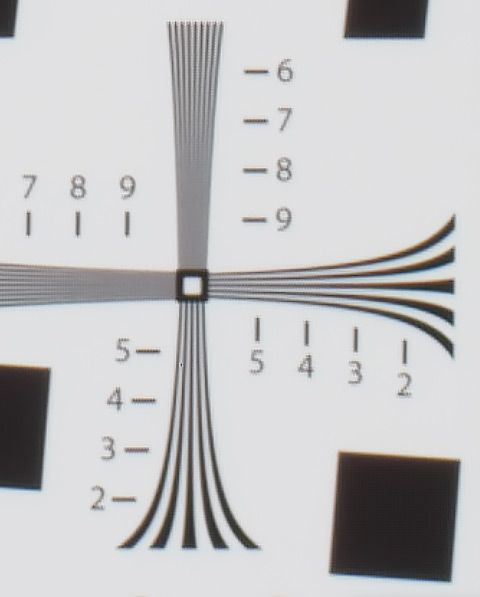
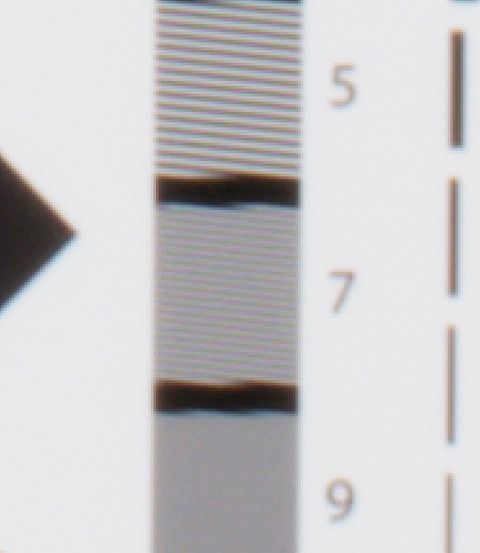
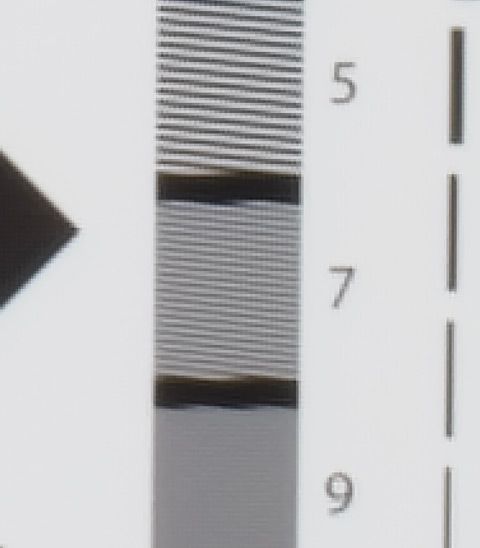
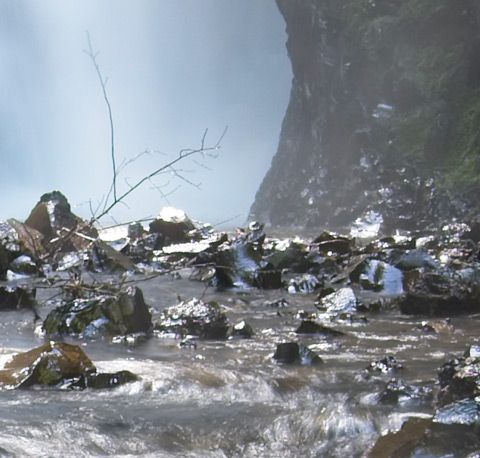
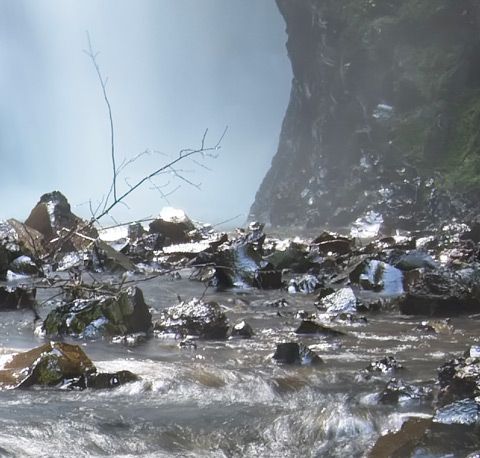
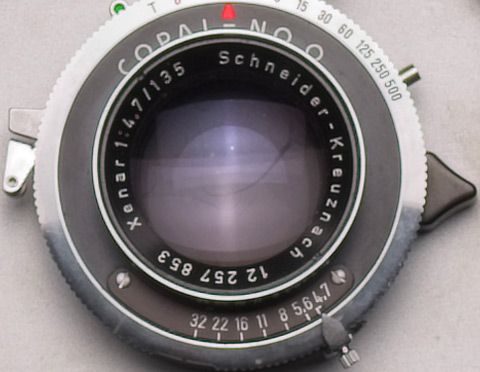
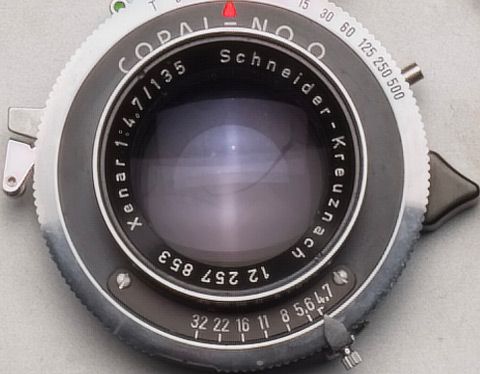
Here are several side-by-side comparisons of demosaicing using a traditional method versus our new demosaicing and denoising working together in ON1 NoNoise AI.
NOTE: Click on any image to view the full side-by-side comparison.
Now that I’ve explained how it works and shared some examples on resolution test targets, you might be asking yourself if this really matters in the real world? That’s a fair question. So often, photographers get too wrapped up in the technical side of photography, debate over minor things, and forget about capturing great photographs. So here are a few real-world examples where this does make an impact.
NOTE: Click on any image to view the full side-by-side comparison.
If you don’t shoot raw, that doesn’t mean you are doomed to have noisy photos. ON1 NoNoise AI works great on RAW images, but it also can remove noise just about as well from JPG, TIF or any other supported RGB photos. The robust AI network behind NoNoise AI has been trained to work with both RAW and RGB images.








26 comments on “How Photo Noise Reduction Software Can Be Better”
On June 8, 2021 at 1:58 am marc labro wrote:
it looks nice but I didn’t purchase it yet, even with huge discount.
Not enough tuto with examples and how to use it and no idea what it will look like inside PR2021.
By experience with topaz denoise ai, without some raw develop on front, a denoise plugin provides a dull image. so PR2021 seems a better concept, like dxo photolab 4 integrating denoising and raw develop.
marc
On June 8, 2021 at 10:16 pm Jeff Hambleton replied:
To be honest, I was blown away by DXO but it’s pretty expensive for me. As I’ve been an ON1 user from the start which has been a struggle, a bit like DOS getting to where it is now, I’m hoping that ON1 will continue to improve and be fair about it to their long term customers. That’s why I bought it.
On June 8, 2021 at 11:29 am Daniel Hagmann wrote:
It looks nice and I bought the license. I hope the noise feature will go into ON1 photo raw and becomes an integrated part of the compelling package.
On June 8, 2021 at 12:45 pm Brian Lawson replied:
It will be added to the 2022 release coming sometime this fall.
On June 9, 2021 at 8:55 am Bill Hercus replied:
As part of the 2022 release …mmm. So those of us who have paid for it now will get a discount for 2022 version?
On June 8, 2021 at 12:20 pm Chris Leonard wrote:
Cant wait to try it out, I have used topaz software and had pretty good results, I already use ON1 so it just makes sense to tie it all together. Got the license just waiting for the download.
On June 8, 2021 at 12:24 pm Al Wilson wrote:
It looks good and I’m looking forward to getting it!
On June 8, 2021 at 12:48 pm Andrea Sigel wrote:
I agree with Marc and Daniel. It would be great to have this integrated with On1PR. Why go through the extra import/export steps? I would certainly be tempted to upgrade my 2020PR, (which I love), if this was included.
On June 8, 2021 at 1:29 pm g.s@mail.dk wrote:
I have ordered it and is very excited to see how it compares to DXO noise reduction which (so far) has the lead.
On June 8, 2021 at 1:36 pm Paul Danger Kile wrote:
I always used Nik dFine, but I preordered your product. I find that noise reduction makes my images look sharper than sharpening, and sharpening ads noise (so I don’t do that anymore).
Building a mask by using control points can be time consuming. My hope is that your product will make that much less necessary.
On June 8, 2021 at 3:27 pm Rodger Wearne wrote:
Hi guys,
I have ordered it and paid for it.
Yes it would be good if it can be accessed directly from within an Edit session of ON1 Photo RAW like Portrait AI.
I have been really disappointed with the results of the Topaz stuff when you can’t export as a raw with side-car and re-import to your package as the same afterwards.
Plus I also find find that the tiff files etc it generates are often plagued with things like purple fringing around edges… And as my image is now no longer Raw I can’t properly edit it..
Most of these packages like Topaz only make plug-ins to run within Adobe lightroom/Capture one I believe too..
ON1 definitely hears the voice of the photographers.
On June 8, 2021 at 5:35 pm Al Aikens replied:
I, too, am looking forward to the release and user testing of No Noise, and if it passes the muster compared to DeNoise AI and PureRAW, I’ll include it in my workflow, as needed.
You can save from DeNoise AI as a dng file by operating the program as a stand-alone application and it will save in the folder with the original image file: launch DeNoise from your OS, open the file(s), perform noise reduction, Save the file and an option box will appear to save the file as a dng in the host folder. I just did this to be sure that it can be done. On1PR recognized the new dng file right away in the host folder within the catalog. This is parallel to the DxO PureRAW workflow and be done before RAW processing.
On June 8, 2021 at 4:02 pm ronhoddo@gmail.com wrote:
I am a pensioner and cash is tight. I would be very interested if say a 30 day demo trial was available similar to PhotoRaw. This would allow me to see on my own photos how this works and evaluate the product.
On June 8, 2021 at 8:45 pm marc labro wrote:
Looking the examples, i notice some sharpening.
With Topaz it is always time consuming to launch sharpen ai and denoise ai.
has ON1 team succeeded to group both functions in a single plugin ?
It would be great !
Or, is sharpening basic and we should we expect seeing a ON1 sharpening plugin coming soon ?
I make Infrared photography with a full spectrum D5600 and external lifepixel filters and focus is difficult. I often notice my foliage is a little noisy and a little out of focus. Should ON1 nonoise help ?
marc
On June 9, 2021 at 3:40 pm Dan Harlacher replied:
Detail enhancement and sharpening (technically not the same thing) will optional, independent controls in NoNoise AI, so you can dial in just what you want on each photo.
On June 8, 2021 at 10:39 pm Mikael Martinz wrote:
Hello …
I used both DXO pure raw and Topaz Labs DeNoise and satisfied whith the results they get, i don´t understund why On 1 Noise not intergreated in ON 1 Photo Raw. I hope this be reality on the next upgrades. In my opinion fells that very bad to pay separatly for this ON1 NoNoise.
Mikael from Sweden
On June 11, 2021 at 6:28 pm Patrick Smith replied:
It will be a part of ON1 Photo RAW in the fall along with a lot more stuff we’ve been working on.
On June 9, 2021 at 12:12 am Stephen Walker wrote:
This looks promising.
But I’m not buying on the off-chance that it does what it says it does.
It needs a trial version so we can evaluate before buying (it’s not cheap in South African Rand).
Will there be a trial available ?
On June 11, 2021 at 6:26 pm Patrick Smith replied:
Yes, there definitely will be a trial version once it is available at the end of the month.
On June 9, 2021 at 1:07 am Iliyan Georgiev wrote:
Looking at the image comparisons, it’s quite evident to me that the increased sharpness comes at the cost of severe aliasing and grid structures. These artifacts are quite conspicuous to me, and in fact convince me that Adobe is doing a better job here — their artifacts are less visually disturbing. Am I the only one to notice this?
On June 9, 2021 at 3:44 pm Dan Harlacher replied:
Keep in mind you are looking at screenshots taken at 400-600% of the actual pixels, so they will look pixelated. When compared to other classical demosaicing algorithms it will appear sharper, resolve smaller details, and have less false colors. At this extreme zoom, you may see a hint of a grid pattern which is an artifact of the process which has already improved and is not present in the current AI model. These samples were generated with a preliminary or “beta” version of the model.
On June 11, 2021 at 4:38 am Robert Montgomery replied:
Thanks Dan, this is a better informed and more thorough explanation of what I was trying to say in my comment. You do great articles and have a knack to concisely explaining things. I’m excited to see NoNoise AI in action out in the real world, it looks to be a real breakthrough.
On June 9, 2021 at 5:20 am Robert Benyon wrote:
I think lliyan has a point However, ON1 will have controls for sharpness and noise to tailor things to a user’s tastes. I have not reserved a copy as I still have active licences for Topaz Denoise and Sharpen and I would like to see Nonoise independently reviewed before committing. I hope it’s good it would be great to work in RAW throughout. If I delay buying til end of 2021 when it is in ON1PR 2022, then no doubt improvements will be made as is usual.
On June 9, 2021 at 5:47 am Robert Montgomery wrote:
A tip for those viewing this: Once you click the picture and go to full screen you can Zoom in/out using Ctrl and Plus or Minus (Command on Mac). Most browsers Ctrl+0 (Zero) resets to default. This lets you see the pics in ‘overall’ view OR ‘Pixel Peeping’ modes.
As Iliyan points out, the artifacts increase using this re-imagined Demosaicing. That said, most pictures are too soft BECAUSE of the Demosaicing, and are the reason most Pros presharpen all pics. NoNoise’s AI algorithm seems to handle most of the inherent Chromatic Aberration as well as doing the presharpen at the demosaicing step. Looks like a Win/Win to me, as the less you massage the pixels the better the pic looks, an important advantage of using RAW. A small amount of aliasing is inherent in ANY sharpening routine so I must politely disagree with Iliyan as almost every picture will go through sharpening at some point anyway …
I do however see some increased noise in smooth areas; see the f-stop pointer in the lens picture, or the jeans and sails on the boat. I imagine that is being handled later in the NoNoise AI app and you were only showing the DEMOSAIC step here (I hope), so overall it’s impressive.
I will once more lobby for a Trial version. On1 has always listened to their customers, I know I’m not alone here. ESPECIALLY if you intend to compete in the standalone market after PR2022 hits and this is incorporated, and sure would help your sales NOW. Personally I won’t buy now because of that but, will probably get PR2022 as I AM an On1 fan.
Let me end on a big “Well Done” on allowing fully RAW processing, something that makes me dislike Topaz DeNoise (which otherwise is pretty good). Having to switch to TIF early in the process is absurd and breaks the workflow. So that’s a BIG Win for On1 NoNoise AI. 🙂
On June 9, 2021 at 8:16 am John Kinchin wrote:
I also have purchased a licence and am waiting to see what it is like. It would be nice to have a release date, not just “June”
However all good things come to those that wait…
On June 10, 2021 at 2:23 pm boris@strivingartists.com wrote:
These are questions to Dan Harlacher.
Let’s say I use Photoshop NoNoise plugin. Where will it work: in Camera Raw while processing raw files? Or after that? Or I should process raw files with NoNoise plugin, save DNG file and then proceed with my workflow?
Please review our our privacy policy for information about how we use the data we collect.